Sunday, December 26, 2021

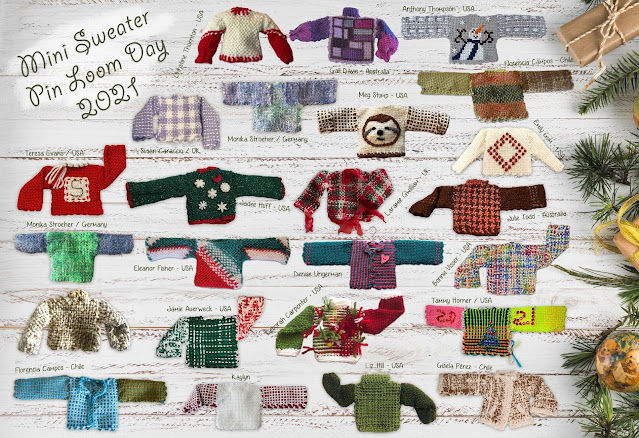
Finally!! Pin Loom Mini Sweaters for 2021

Thanks to Florencia and to the many weavers who shared their mini-sweaters, we have another fabulous field of pin loom creativity. Many thanks to everyone who took part. 


My new mini sweater plan is to begin now and start making mini sweaters any time I find that I have woven the wrong size or an unneeded square. With any luck I shall have the start of a new Christmas ornament tradition. They may not be as wonderful as the creations above, but it should be a lot of fun. 


How to participate

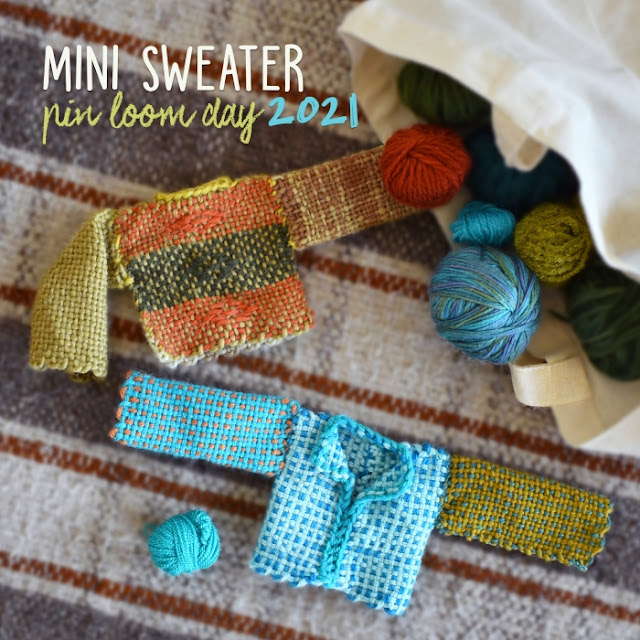
Grab your 4x4 loom and start weaving your mini sweater! The only requirement is that you do it only using four 4" x 4" squares. You can use any type of yarn you like with encouragement to use the leftovers that you or your friends already have at home. 

How to make a mini sweater

No need to be a pin loom expert. Follow the step by step instructions below or check out Florencia's PDF with everthing you need to know. 

How to send your designs

Place each sweater on a white piece of paper and take a picture straight from above. Try to take each picture with daylight and send them in a good quality .jpg file (150 dpi min) to: florencia.campos@ullvuna.cl

Deadline

Florencia will be gathering pictures through December 18. We will publish a large picture of all of the mini sweaters on December 20.


If you are anything like me (or like Gary, my Mini Sweater model) you have been waiting on tenderhooks for the next Mini Sweater Pin Loom Day. 

The theme this year is gathering up and using all those tiny scraps of fabulous yarn-- to good to throw out, too small to use on anything but a Mini Sweater.  Gather them up and make one... or two... or a whole Christmas tree-full of Mini Sweaters. 

Use this link to find a downloadable PDF in English and Spanish with complete directions from Florencia Campos Correa on making Mini Sweaters.

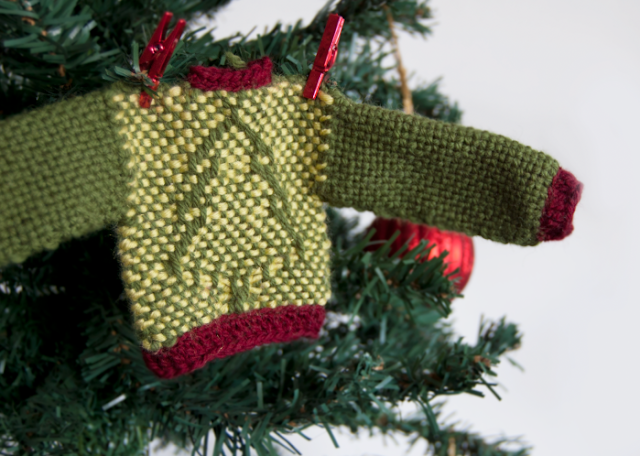
Keep in mind that the basic sweater is easy to do, using four 4" squares to create the cutest little sweater. Weave them using the 3 layer method or add extra levels of design by weaving every line using the two layer method. 


Don't forget that deadline, send your mini sweater pictures to Florencia at florencia.campos@ullvuna.cl by December 18.    
Every year the sweaters get better. I can't wait to see yours!

Friday, December 3, 2021

Hanging Out with Hazel Rose

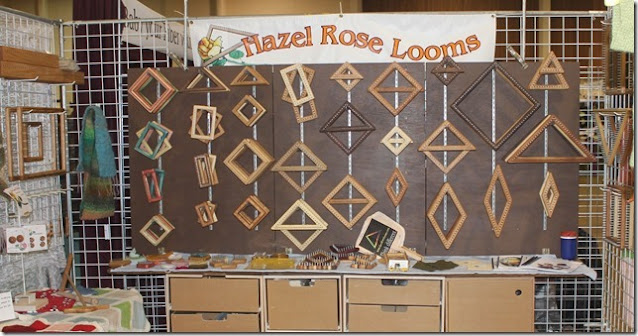
A long time ago... or at least it seems like a long time ago (before Covid) I used to go to fiber conferences. I would often teach classes, have a booth, sell pin loom items and books, and just generally hang around with other weavers. It was wonderful. My very favorite conference was the Oregon Flock and Fiber Fair because I could go visit my daughter in Oregon and because Hazel and Randy Spencer, owners of Hazel Rose Looms always came to that conference, too. 

I can't tell you how great it was to see her booth because, quite honestly, it's a lot harder to sell cool pin loom patterns if people can't find pin looms! 

We always had an agreement-- that when people asked me where to find looms to match my patterns, I could point them towards the Hazel Rose Loom booth out on the lawn... and when people were wondering what all they could make with her extraordinary variety of looms, she could mention the Pin Loom Weaving books available at my booth. 

I know that we will be back at fiber conferences in another year or two, but in the meantime I talked to Hazel about our meetings and learned a little more about what she's been doing. 


She reminded me of the lap blankets that I made using her 12" triangle loom along with 4" squares. I actually used two ends of worsted weight yarn to weave the triangles in order to get the same tight weave that you see in the 4" squares. 

Hazel noted that she had put together a really fun weave-along on at the Pin Loom Weaving Support Group, which people had enjoyed. I saw a bunch of the finished items, they were wonderful. We both talk about how much we missed traveling to fiber conferences to hang out and talk with other weavers. I hadn't realized it, but Hazel and Randy have been making looms and traveling to conferences for over 20 years. 

These are my basic Hazel Rose pin looms. While it makes sense to start out with just one or two-- I recommend starting with the 4" and 2" square pin looms, the rectangle looms are a much easier way to produce the various parts for pin loom animals and more complex patterns. 

I have to admit that I now own most types and sizes of pin looms. It took me a while to get over the guilt of having so many pin looms. It helps that they are all very small so that they don't really take up much space (as opposed to my yarn collection which has totally overwhelmed my hobby room and is making advances into what was once the guest room). What moved me past the last of my embarrassment over the number of looms I have is when a friend pointed out that my entire collection still costs significantly less than one small table loom. It's all a matter of comparison. 

I know it may be a while yet before we are all out on the road again. In the meantime it is nice to know that there are fellow weavers out in the world and we can get together through the Looms To Go group on Ravelry and the Facebook Pin Loom Support Group

ps: I have to admit that I love the Facebook Group Name just because it so aptly reflects that we've got all sorts of support from fellow pin loom weavers and that it's kind of an addictive process. MS

Thursday, October 21, 2021

What to do with all those clipped ends?

 For years I have littered my house with small bits of yarn-- the clipped ends from pin loom woven squares and rectangles. I finally started putting an empty Kleenex box next to my chair in hopes of containing the mess. This receptacle is my next step up from the Kleenex box. 

This was a simple decorative box until I added a hole to the lid. But it has worked so well and been such an elegant improvement in terms of keeping the yarn litter off the floor and out of my vacuum cleaner that I had to celebrate it with everyone! 

Weave on! 

Saturday, October 16, 2021

Pin Loom Weaving on the All n One Knitting Loom

I personally believe that any weaving frame that has pins or posts located all the way around counts as a pin loom. 

So while most people are perfectly content to use a knitting loom as a knitting loom, my preference is to look at a knitting loom and say, "Wow, that would make a great pin loom!"

This is a Kb 5/16's All n One Knitting Loom using the two inch side pieces. 


Which is how I came to start weaving pin loom rectangles on a Fine Gauge All n One Knitting Loom from Kb Looms. I had been weaving on the smaller Fine Gauge Original Sock Loom for some time and found it to be a fun, easy process. (All the directions for weaving on knitting loom can be found in Pin Loom Weaving To Go.) But I wanted to be able to make a piece that was longer than 7 inches. The All n One Knitting Loom can weave a piece up to nineteen inches long, more than I needed for this project. 

This scarf is 69" by 8 1/2" and is made up of thirty-one 2 1/4" x 8 1/2" rectangles. I liked the repeating pattern, and was planning to make ten in each color, but then decided to put a dark navy rectangle on each end.  The yarn is Plymouth Yarn Encore acrylic/wool worsted weight. 


This is my All n One Loom while I'm weaving one of the pin loom rectangles. The lovely thing about weaving on it is that while you are producing a simple, pin loom rectangle, you can easily use a wider variety of yarns, especially thicker yarns, because of the wider pin spacing. This also means that it is  easier to pass the needle through the pins. 

Whenever I am weaving on a narrow setting on a knitting loom, I use the Susan Bates five inch weaving needle. It has an enormous eye, it is a bit thicker and much stronger than the normal pin loom needle and it is inexpensive and easy to find. 


This is definitely a cold weather scarf intended for Minnesota winters. I joined it using a mattress stitch, which is amazingly quick. This pattern would work well, maybe better, if it was woven in a DK or light weight yarn, maybe with more variation of color within the blocks.

But let's face it, what is the point in having a larger loom if we can't make larger pin loom squares/rectangles?


This is the Fine Gauge All n One Loom set to it's largest dimensions. I swapped out the two inch spacers for the nine inch extensions so that the weaving area measures 9" x 19". The yarn is YUMMY by The Hook Nook. It is a #5 bulky yarn in acrylic and wool.  

I wove up two pieces in the same size. They measured eight inches by eighteen inches off the loom. Each piece took about 60 yards of the bulky yarn. 

I joined the two pieces to make a cowl. After joining, I pulled up three weft yarns in three equidistant places in order to gather the cowl in a little. 

The result is a simple, very wearable cowl made with great ease on a knitting loom!


Of course, that's not the end of the story. There are endless possibilities with weaving.  This last piece was also woven on the All n One Loom using the extensions. It measures 9" x 12". It has almost twice as many ends per inch as the cowl and that, along with working in the pattern, made it much more challenging to weave. I'm not saying that I wouldn't weave something like this again... but I would have to have a darn good reason for going to so much trouble. 


I feel like I would have been better off moving up to a rigid heddle to accomplish this look. Plus a rigid heddle would have given me the space to make something a bit bigger, so that it could be used as a place mat, or woven in cotton for towels or dishcloths. 

On the other hand, the All n One cowl was so much fun to make that all my relatives may be getting one for Christmas this year. "It's a cowl, Uncle Jim, just deal with it."

Saturday, July 31, 2021

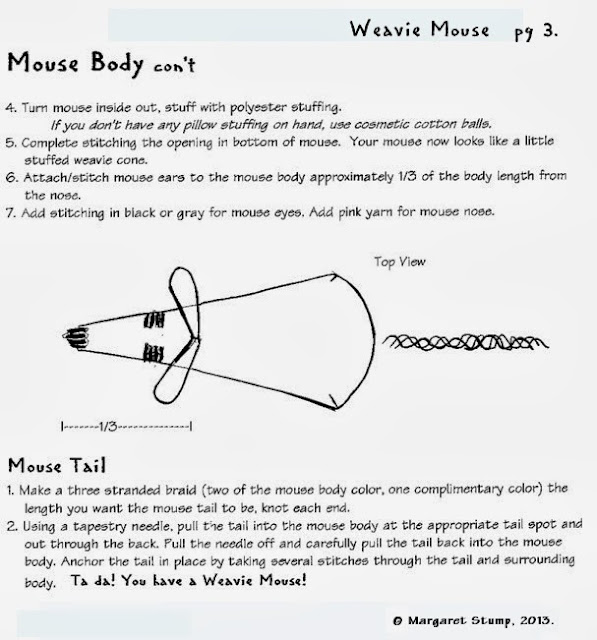
Pin Loom Mouse Sachets, also known as a Catnip Mouse

Here we are in the midst of summer. The one thing we can count on this year is that gardens will grow and flowers will bloom.  So I am reprinting this mouse sachet pattern, thinking that this might be the perfect time to plan out a Lavender mouse or two as fun embellishments or little gifts. 

Introducing the perfect house freshener/ fun cat toy/ unforgettable bookmark or unique sachet to tuck away in a drawer or closet. Make your very own rose petal mouse, lavender mouse, catnip mouse or an "insert-your-favorite-flower-or-scent-here" mouse.


This is one of my earliest patterns. I have been making catnip mice, mouse sachets, and weird little mouse toys for many years because people love them and it is a fun and easy pattern, using one 4"x 4" square and two 2"x 2" squares. They are easy enough to make multiples for craft fairs or church fund raisers.

Consider adding extra value with embellishment such as black beads for eyes or embroidered flowers to give your mice a whole new look. I chose to leave off the stitching for the nose, I think it gives them a cleaner, more modern look.

Enjoy this old pattern and may your home be blessed with pin loom mice!


Wednesday, June 23, 2021

Pin loom weaving raffia, yes, it can be done

Raffia is definitely a summer fiber-- colorful, light, perfect for light breezy projects. But I have run into a number of pin loom weavers who questioned whether it's possible to weave with raffia, and my major concern, would it be fun to weave with raffia?


To answer the first question-- can you use raffia on a pin loom, the answer is a definite "Yes". Not only can you weave with it, you can add all sorts of patterned weaves to add to the summery feel. 

The second question-- "Is it fun?"  took me some weaving exploration to discover. 

If you have read many of my posts, you may have noticed that having fun while weaving is a top priority for me.  When I first wove with raffia it was definitely not fun. 


I first tried weaving with three layers of raffia, using a cotton yarn for the fourth layer and found the process to be frustrating and not fun. Not only was it extremely difficult to weave, but the several layers of raffia made for an overly-complex weaving surface. It was difficult to do and didn't look that good. But I found an answer. 


The answer was to use just one layer of raffia, letting the colors and pattern of the fiber shine through, and completing the weaving with a complementary colored cotton yarn. It worked beautifully whether you do the weaving in a plain, tabby weave or bust out an overshot pattern. (Reminder- you can find great overshot patterns at Eloominations.com.)

In terms of projects, I decided on a summer table setting, with raffia/cotton mats for coasters, drinks mat and place mats. I am still working (albeit slowly) on a summer table runner, using a variety of colors in the raffia and cotton.

So consider tackling a new fiber for the pin loom, and have a fabulous fibery summer!

Friday, May 21, 2021

Cool summer scarf from a 12" triangle pin loom

This is a Covid story. I took a picture of these lovely triangles the last time I met with weaving friends on February 15, 2020. Brenda was planning to make a scarf and promised that I could take pictures of it the next time we met. I never expected that it would be fifteen months before that happened!


Forward to May, 2021 when I finally got to see, and take pictures, of the completed scarf-- while standing in the Minneapolis IKEA parking lot. 

The triangles are woven in fingering weight hand dyed blue-green merino. The joins and edging are same weight turquoise merino yarn. 

The scarf is made using ten triangles. They were woven on a 12" Hazel Rose triangle loom. 

I know that the gorgeous pin loom effect when using variable yarn is old news to most weavers. I admit that I am always moved by the incredible way that the colors meld and compliment one another with this style of weaving. 

I also want to note the lovely crochet edging on the scarf ends. I did not have enough sense to ask Brenda about the exact pattern, but if anyone wants to know, I am sure that I can get her to share it with us. 


Brenda, thank you so much for being willing to share your beautiful scarf. 


Friday, April 30, 2021

Weave a ridiculously cute Pin Loom Owl Bag

Introducing an extremely cute companion for Spring. As you may have noticed I love making animals and owls are a particular favorite. I also love small bags and bags that have secret pockets in them, so the Pin Loom Owl Bag hits the trifecta. 

It is a great size to carry a phone and has extra little pockets in the wings. Each owl takes six squares for the body, two for the wings, and two for the eyes. This makes it a great project for those special leftover yarns-- too little to use on a regular weaving project, too precious to give away. The Owl Bag is made using only a 4" pin loom (except for your choice of purse strap) and features hand felted pin loom eyes.


Follow the illustrations below to make your own Pin Loom Owl Bag. 

A)  Lay out the six squares for the body and join together using a double overcast stitch. You can find further information about the double overcast stitch HERE. Fold the two bottom squares in half on the diagonal and tack them in place to the inside of the bag.

B) Fold the two sides of the bag in and finish joining the bag together. Whip stitch the bottom front and back of the bag together, first tucking in the corners to create a more rounded, owl-like bottom.


C) Weave two squares for wings. This is a great place to use your fancier yarns. Take each wing square and turn down the top corner and tack the corner to the inside. 

D) Line the wing up with the body so that the bottom tip of the wing is close to the bottom of the owl body. Tack the wing in place to keep it stable while you whip stitch it. Using the wing color, stitch around the two sides of the wing, leaving the folded-in top open to create a small pocket. Repeat this process with the second wing.


E) Make the owl eyes. The colored portion of each of the owl eyes was made by cutting a 1 1/2 inch circle from a felted pin loom square. See directions for felted squares below. I used yellow and pale blue for the owl's iris, but you can use whatever color you want. The owl's pupils were made by cutting a one inch circle from a black felted pin loom square or using a 1 inch button.  I stitched the iris on to the bag but found that glue worked much better for attaching the pupils. 

F)  Add the owl beak. Using a tapestry needle with your choice of color, use satin stitch to create a beak that is approximately half inch wide at the top, tapering to a point over its three-quarter inch length.

G) Attach your handle. These owl bags were made using small bamboo rings and lightweight faux leather straps.  


Since first making the Owl Bags I have found that the lightweight straps work beautifully and the bamboo rings really don't work at all. Using the bamboo rings was a fun experiment but the only place they are really handy is if you want to hang your owl bag on a doorknob, maybe as a catch-all for pens or scraps of paper. If you want to use it as a purse, I recommend a manufactured or handmade strap. 


Making felted squares. Squares used for felting need to be constructed from 85 to 100% wool or they will not felt satisfactorily. Since you will only be felting one or two squares, you can do it easily and quickly by hand. Submerge the squares in hot water, add a small amount of shampoo or mild dishwashing soap and rub and roll them vigorously between your hands. They will very quickly begin to shrink and thicken as the fibers pull together. They only need to shrink by about 25%. When the squares measure about 3ins, rinse them out and lay them out to dry. When they are dry you will be able to cut out the circles for eyes with minimal fraying. I think a little fraying looks good because it softens the eyes, so don't worry if they are not perfect.  


There is another great reason for making Owl Bags. As the world starts to get moving again and craft shows open up, Pin Loom Owl Bags make a really cute craft to sell. 

While the copyright says that you are not allowed to make copies and sell my patterns, you are always welcome to make and sell your own hand woven goods. 

I do hope that if you decide to make some Owl Bags that you will share some pictures with me.  Margaret Stump

Monday, April 12, 2021

Weave Pin Loom Carrots for Spring

Spring is in the air and the time is right for making pin loom carrots. Brighten up a counter or add them to a package as an extremely unique embellishment. These were so much fun to make that I'm going to end up with a big bunch. The larger carrot was made using a 6" loom, smaller carrots from a 4" loom. It would be totally possible to make a gorgeous giant carrot by joining four 4" squares, but I'm okay with these sizes. 

The carrot greens are made with lime green scrubby yarn, which has a wonderful organic look. I added the root texture with stitches in light brown yarn and used the same color for some straggly roots.  These directions are repeated below along with my attempts at illustrating the making of a pin loom carrot. I hope you'll try a few carrots of your own.   Happy Spring Carrot Day!


Wednesday, March 31, 2021

Unearthing Old Pin Loom Projects

After falling off of my very lax schedule of posting a couple times a month, I found that I needed some inspiration to get back in the swing of pin loom weaving and writing about it. I ended up going through some very old boxes that had been lost in the basement and found a hanging that I did in about 1980. Sad to say that the mice had found it and made the most of it. But despite some holes and evidence of an ancient mouse nest, I still like this hanging very much. I completed it back when I was falling in love with weaving squares, but struggling to figure out what to do with them. The strips of cloth between the colored squares were sewn from upholstery cloth that I had dyed black.


I also found the original paperwork and one so-so picture of an early weaving project, Victorian House. I am really quite proud of the project except that I look at the construction and wish that I could go back in time and teach myself how to properly join the squares.  It took me another thirty plus years to build a library of good pin loom joins. 

That's it. Two pieces that I feared would never see the light of day again. I will get back to posting on current projects again very soon.  I hope everyone is well and working to be patient in dealing with the many issues (plague, crazy violence, etc.) that we are facing these days.  MS

Sunday, January 31, 2021

This Valentine's Day send a Valentine Elephant

This elephant started out intended as a "Good Luck" Elephant. As I was finishing it I realized that we are only about two weeks from February 14 and, while you might choose to change the pattern on his sides to something that features hearts or flowers, this lovely little elephant would make a really special Valentine's gift.  

Of course, you could make it even more special by threading a diamond ring on his trunk-- that would really be unforgettable. No, I take that back. That might just come off as pretentious and overbearing. Just go with the elephant, it is heart warming and sincere. And have a wonderful (possibly socially distanced) Valentine's Day. 

This pin loom elephant pattern is featured in the book Adorable Beasts along with 29 of his best pin loom friends. 


Once you have woven your pin loom elephant (or other preferred valentine object) you can decorate it with any design.  The designs on the left are a few that might work for you. 


Sunday, January 10, 2021

Pin Loom Panda, a new beast for a New Year

It's a new year and like a lot of people, I want to do everything I can to make it better than the last one. So this seems like a great time to introduce a new "adorable beast". The panda is not in the Adorable Beasts book although the bear is-- you can see the difference between them in the picture at the bottom of this post. 

This means that with a few alterations from the original bear pattern found in Adorable Beasts, and with a change of colors of course, you can delight your world with a special panda mascot, or a whole panda family. 


To make a panda you will need the original bear pattern found in the Adorable Beasts book.  (Just look slightly to the right of this post and you will see all the particulars on the book.)  The difference between the Adorable Beasts' bear and the panda is the size of the head and neck. In order to look like a respectable panda, the head must be a larger size than you will see in the original pin loom bear.                 

Follow the directions for the Adorable Beast's bear making these changes--

1. Instead of using 4" x 6" rectangles for the body, make the body using two black 2" x 4" pieces for the front of the body and two white 4" x 4" pieces for the back of the body. 
2. Make the legs just as directed in the book using black yarn. 
3. Make the neck 7" around. 
4. Make the face by using a 3" x 3" square, or use a 4" square--tucking the extra cloth to the inside. 
5. Make the ears in black and add extra large black spots for the eyes. I also made the black nose bigger and more pronounced on the panda.  

These changes in the bear's dimensions seem relatively minor, but they are enough to produce a pretty darn good panda. Enjoy! 

If you have any questions about this process, feel free to get in touch. My email is located in the right hand column at the bottom. You just need to take the spaces out. I would love to hear from you. 
Margaret (Meg) Stump