Wednesday, December 13, 2017

A Beary Nice Gift Card Holder

As you may have guessed I am not happy with any gift I give unless it has been at least partially woven.  And while my adult kids regularly receive woven animals whether they want them or not, I decided that the best way to use pin loom weaving would be with a unique gift card holder. My original plan was to make a cat with long arms holding the gift card, but the face ended up much more bear like so I added the bear feet as an extra touch.


You will find directions to make the beary nice gift card holder below. I used an acrylic yarn, Impeccable "Earth" color. However, the colors turned out rather dark and I think that it might look better in a lighter, solid color, like tan or ecru.

It would be easy to change the features and crochet different ears to turn this bear into a dog or cat or rabbit.

I'm afraid my instructions below on the head aren't very clear. The head is made by stacking the 2 - 2x2" squares together, stitching them together by using a running stitch in a circle around the edge of the squares and then turning them inside out and stuffing. Attach the open end to the top of the body.


Sunday, December 3, 2017

Pin Loom Travel Tags -or- how to keep a watch on your luggage.

Since about 93% of all luggage carried these days is the same style and color, many people decorate their suitcase with a pink ribbon or bright tag. This makes a great opportunity to add a pin loomed touch to your travel and upcycle a thrift shop find-- like an old watch or bracelet.

This project requires two 4x4" squares and a watch with a band or other jewelry with a strong clasp. Take the watchband off of one side of the watch and attach the two halves of the watch to two squares. Then sew the two squares together to form a pocket. Drop your name and address into the pocket, it will be safe in there in case its needed, and buckle the watchband around the suitcase handle. Now there will be no question about identifying your luggage with ease.

(Though it would be fun if we all did this and then ran into one another at the baggage claim... Finally, a way to identify other pin loom weavers!)


It goes without saying, although I'm saying it anyhow, that you need to choose a watch that is no longer working. If you use one that is still running I can pretty well guarantee that it won't be working by the time you claim your luggage. If anyone is wondering at this point, "why a watch?" I think it would be a fun, funky use for an old watch and it comes with its own strap.

Once your start making these little woven pockets you may decide that they are perfect for gift cards, tree decorations and backpack embellishments. I like the idea that you can make them with some ease and match the gift recipient's favorite colors. If your plan is to give some cash for Christmas, this makes a great way to give them a thoughtful, personal gift and still let people get what they want. 

Saturday, November 25, 2017

A pin loom Gnome for the holidays!

I'll be Gnome for Christmas... Gnome Sweet Gnome... There's no place like Gnome for the holidays...  


PATTERN DIRECTIONS FOR A PIN LOOM GNOME


This is a pattern that I worked out with the assistance and  encouragement of a fellow Oregon Flock and Fiber participant.
She mentioned that she wanted to make gnomes and we worked out just how fun and easy it would be to weave up Pin Loom Gnomes for the holidays!


This is a fun little pattern that will have pin loom gnomes appearing everywhere this season.

Add them to every sort of holiday decoration, make a few Gnome Wreaths, use them for that last minute stocking stuffer or have them popping out of every corner.

They are so cute and easy to make that its hard to stop.  So I wish you a very Gnomley holiday season!


Saturday, November 18, 2017

Pin Loom Backpack by Linda Wolf


Its been forever since I have posted and that is not because there aren't wonderful things happening in the pin loom world. There is so much happening that its hard to stop and take a breath (and post something). 

Case in point, this backpack was made by Linda Wolf of Oregon. She created it in parallel with my book, Pin Loom Weaving To Go, which just shows that great minds think... about backpacks, I guess. 


Linda allowed me to share her creation, which was shown at the Oregon Flock and Fiber Festival. Here is what she had to say about it:

This little project backpack began life as a rug. When I was a weaving student in 77-78, we were given the assignment to dye the yarns for our weaving project. I dyed commercially spun wool yarn with commercial dyes (manufacturer of dye and yarn long forgotten) and made a rug which I used for many years. 

In the long run the warp chosen was not a good choice and gradually looked pretty ragged. I really didn't want to just toss the rug or give it to the dog so I pulled it apart. Some of the yarn was very tender so to maximize the yarn, I used my pin looms to create the pieces, sewed them together, then crocheted the large pieces together to form the backpack. I found the jingle shell on the beach which seemed like the perfect closure. I twisted a rope of the yarn for the straps using, "The Incredible Rope Machine".

The judges were particularly impressed with the nice color placement of squares, the "upcycle" aspect of the project and the woven patterns in chosen squares, as was I.

I am blown away by someone actually taking the time to pull apart the rug in order to make these wonderful squares. If it had been my rug, it would still be sitting under several bags of other projects where I would point it out to people and explain how I was going to take it apart and turn it in to something wonderful... the difference being that Joyce actually did it and entered it in a competition.

One more item from the Oregon Flock and Fiber Festival 

This is a snapshot of my book vendor display with an extra element, Sara Cross's hippo frolicking with my pin loom hippo. Don't they look happy together? Sara pointed out that hippos do have tails, as is demonstrated in this illustration.  (Due to an error on my part, Sara is only now getting credit for her amazing hippo, hopefully the first of many artful pin loom animals. MS)


Tuesday, September 19, 2017

So many many many ways to pin loom

I have to admit that I spend most of my free time either weaving or thinking about weaving or thinking about a different way that I might use pin loom weaving. (You may sense a theme here.)

What I'm not doing enough of is looking around at the phenomenal approaches that others are taking with pin looms. So here are just a few of the wonderful projects I've run across. Each weaver gave me permission to share their incredible work.

Laura Waskiewicz Sapko 

Laura's scarf takes advantage of the repeat in her yarn, with some active input from the weaver. Laura noted, "I used double strand alpaca lace yarn. I had two balls so I could line up the repeat (or not as desired). I used one strand to chain 3 in a zig zag between two squares making two 12 square strips. Then chain 3 in a zig zag to attach the two strips to each other. The edge is chain 6 scallops from bump to bump with two in the same spot at the corners. I did three rows of it."


Katheryn Rider Carras

Katheryn is likely not the first person to look at a 4" square and say, "you know, you could use that as a backing for rug hooking" but she is definitely singular in her range and output. I am blown away by the time, care and artistry in each woven, hooked square.


Karen Young

Karen shared some pictures of her most recent purses. I particularly like her integration of two different loom products in the purse on the right. (And I am thrilled to see that she used some of my ideas in the Light Shoulder Purse.

Karen wrote, "Here is my take on the Light Shoulder Purse.  I used a white warp for 2 layers, one layer red warp and then wove green in chain stitch.  Finished this a while ago, except the snaps and button covers. Made myself get it out and finish it now as this will be my Christmas purse.  Found the Nutcracker pin to cover one of the snaps.  I'm going to keep that in mind as a way to change the look on the more all season purse that is still sitting in yarn balls waiting for three other projects to be finished first.  Enjoyed making the pattern.

The other purse was a combination of techniques.  Wove a (almost) square to finish a warp on the floor loom.  It was approximately 26 x 28.  Folded into a triangle and then folded the ends in. Wove squares and felted them for the cover on the bottom, partly to cover the seam.  Wove small squares to fasten the rings for the handle.  Turned out well.  Want to try this as an all pin loom project in the future." Thank you, Karen. I could totally see this being a fun pin loom project.

Carolyn Flpaa

You may remember Carolyn as the weaver of the astonishing Mother of the Groom outfit as well as the clever and prize winning Prairie Points. Check out some new close-ups of the top and skirt which I added to the original post... which you will find here--
The ultimate Mother of Groom outfit!

All proof of pin loom weavers doing thrilling work. Thank you so much for letting me share!

And one more thing--

Pin Loom Support Group

If anyone out there hasn't checked out the Facebook Pin Loom Support Group yet, I would encourage you to sign up. You do have to request entry into this group but if you know what a pin loom is, you will feel very welcome and at home there. 

Sunday, July 23, 2017

An update on joining squares

When you work with very small squares of cloth the issue of joining the squares is a very big deal. You may be aware that I have a whole section on the page Pin Loom Essentials devoted to some of the different joins that I use most. This note is an update about one of my favorite joins, the double overcast stitch. In the past I have suggested that it works best to use this stitch with the two lines of loops matching perfectly, then taking two stitches through each matching pair. Like this...


What I've only recently discovered is that this stitch works even better if you line up the squares so that the loops don't match up but instead are staggered. You then take two stitches through each pair as shown below.

DOUBLE OVERCAST STITCH

This may seem like a ridiculously small change but I think that it makes a better, smoother fabric. The other reason that I really like this join is that it is crazy strong. I primarily use it when I'm making a blanket on the basis that there is going to be quite a bit of stress on the seams due to the blanket weight and, if at all possible, I never want to have to go back and repair a hole in anything I've made.

Here are a couple examples from a blanket I'm currently working on using this double overcast stitch through staggered loops. The finished side of the blanket is on the left, the underside of blanket is on the right. The finished side lies nice and flat, there is a discernible bump on the underside seam.


Right side picture is the underside where I have not yet cleaned up all the yarn ends.

One further update on joining techniques. 

I recently ran into a lady in my local yarn shop who makes scarves using hairpin lace techniques. She showed me a join that works pretty satisfactorily with pin loom squares. You can see a video of the join at One Loop Joining Hairpin Lace Technique. It involves using a crochet hook to chain loops from the squares on an alternating basis to create a very snug and stable join. I have tried it a few times but have not yet figured out a way to make certain that the two squares stay perfectly lined up. So far, my attempts have led to the two squares being well joined but offset from one another. This will take some practice before I would use it in a project to be shared with others.

I think that this join may work really well with pin loom squares that have been woven on a potholder loom. (This is a technique that is demonstrated in the most recent book, Pin Loom Weaving To Go.) Because the potholder loom produces a much lighter, soft-woven square there would be more room to work and this join might be perfect for a scarf or shawl.

Monday, May 15, 2017

A Pin Loom Alphabet

I used to believe that pin looms were being overlooked and underrated due to their simplicity and size. But when I look around (and I'm usually looking at something involving pin looms) I find people doing fun and incredible things.

For example, this is a Pin Loom Pattern Baby Blanket and Alphabet Set by Yarnovations.

Pin Loom Baby Blanket and Alphabet and Number Set


What a wonderful and creative idea! Its true that I may not make this specific pattern because I really like my own baby blanket patterns. But I LOVE the idea of having the entire alphabet plus all the numbers available! How cool to be able to easily weave a name, a birth date, a wedding anniversary right into the fabric of your next project. Check out Yarnovations right here.

Sunday, March 19, 2017

Marilyn Wing, Master Pin Loom Weaver

I was lucky enough to catch up with Marilyn Wing, a master pin loom weaver who has been practicing the craft since about 1936.

Marilyn is responsible for the extremely clear, lucid directions on bias weaving on the 4" pin loom and was kind enough to allow me to put the project plans for her bag in the new book, Pin Loom Weaving To Go. So I had to catch a picture of her with bag and book on hand.

Marilyn was also kind enough to let me share a glimpse her latest creations, scarves spun out of raw, dyed silk, woven on the pin loom. That "raw, dyed silk" description might sound clunky-- it goes to show how little I know about what she is doing. But I got to see the silk cocoons that she begins with,

then carefully unrolling/pulling apart a fiber that is so light that you can barely feel it. She spins it into a yarn and dyes it, using the pin loom to produce the exquisitely light, airy, soft scarves you see here.

The sample on the right was woven in a traditional horizontal/vertical weave with pearls woven into the weave. I do wish that I could somehow translate into these pictures the extraordinary gossamer feel of these scarves.

The mobius type scarf below was woven using the continuous bias method with two rows of squares. One of the several aspects that blows me away is that after dying the silk yarn in multiple colors (!) she wove each square to exactly match the others so that the colors of warp and weft flow from one square to the next.  It is just lovely.

For all those who have considered bias weaving on a pin loom but was not sure where to start, I would encourage you to check out Marilyn's directions for bias squares and triangles in Pin Loom Weaving To Go. She makes it so easy to do.


Sunday, March 5, 2017

The secret of the Pin Loom Biscornu

So what do you get when you sew two 4" pin loom squares together and stuff them?  A puffy square, right? Not if you're Caroline Fylpaa, who has mastered the secret of the Biscornu.  

To quote Wikipedia: A biscornu is a small, 8-sided, stuffed ornamental pincushion-like object. A button is typically secured in the center of the cushion to give a small depression on the top. Beads, tassels and other objects can decorate the biscornu. They are typically able to fit in the palm of your hand. The name is derived from the French adjective, biscornu, meaning skewed, quirky or irregular. 

One of the ongoing challenges for pin loom weavers is to figure out new and interesting things to do with our favorite loom. Caroline has kindly offered to share her experience making a Biscornu Woolie Dryer Ball.  


She explained, "I love exploring , designing within the constraints or challenges of a craft. I'm sending you a sample of dryer ball infused with lavender, stuffed with wool fleece. Composed of 2 pinned loom squares, top one placed diagonally over the bottom one so that when stitched, the corners meet at the half point of other square." So instead of a boring old stuffed square, we have this very clever eight sided biscornu.  Caroline notes, "it was chained stitch embroidered before being stitched together and stuffed with wool."  Stitching was added through the middle to pull the top and bottom into the tuffet shape. 

I love this creative use to help laundry go a little greener. But I can also see a bunch of embellished biscornu pincushions and ornaments in my future!  As Caroline noted, "play with these patterns... see what you come up with.  

Wednesday, February 8, 2017

A new book - Pin Loom Weaving To Go

So here it is, coming out this month, a new book of pin loom projects and techniques. I am extremely excited (and a little scared) to see it go out. Its like sending your youngest child off to school.

My original idea for this book was that pin looms can offer a fun, first step into fiber arts. So I included a number of beginner-type projects that would work for younger weavers or groups of kids or adults who are just beginning to weave. I included a simple to make 2" loom pattern so that kids could learn to both make and weave on a loom.


But then I started thinking about how so many of us had our first weaving experience on a potholder loom and how cool it would be if we could turn all the potholder looms into pin looms. So I wrote a section on weaving in the pin loom fashion on a potholder loom. You use a potholder loom and a hook, I suggest using an afghan hook, and the directions teach how to weave a big square with finished edges so there is no need to finish with a crocheted edge when you pull it off the loom. There are also a number of projects, including scarves and shawls, to make on a potholder loom.


But then I started thinking that if you could pin loom weave on a potholder loom, maybe you could pin loom weave on other available looms. After some experimentation I found that the 7" fine gauge adjustable knitting loom could be used as a pin loom to make an incredible variety of pin loomed fabrics. Techniques and projects for weaving on the knitting loom are also included in the book.

These log cabin style pieces were woven on the knitting loom, the 2" pieces in the middle were woven on a 2" pin loom.


And then I remembered a pin loom friend, Marilyn Wing, who has been pin loom weaving since 1936 and long ago perfected a continuous warp, bias weave on the pin loom. She was kind enough to permit me to share her directions for weaving on the bias on a zoom loom/pin loom as well as allowing us to all share in her wonderful quilted look bag pattern.


By that time I had thought up a bunch of cool patterns for the 4" pin loom/Zoom Loom that I just couldn't leave out of the book. One of my favorites is the "Blooming Backpack" that appears on the cover. Another favorite is the Zoom Loom Blue Shawl shown below.


This is just a few of the 30 or so projects. It is my hope that people, including kids and fiber groups, will find at least some of the items in the book to be helpful and fun for them. Margaret (Meg) Stump

Tuesday, January 24, 2017

A Pin Loom Ruana

Here is the finished pin loom ruana.   I have found it to be comfortable and warm. I am amazed by the difference in the feel of the fabric after a very light washing/fulling. Before it was fulled, there was a feeling of it being a bunch of squares sewn together, afterwards it just felt like a supple fabric.

My method of assembly closely followed the directions in the Pin Loom Weaving book. I joined the squares in strips using a double overcast stitch. I left several inches of yarn dangling on each side of the joined squares so that I could tie the strips together in order to keep the corners of the squares lined up. Before I washed it I went back over the lines of stitches to make sure that I hadn't skipped any stitches and left holes (I had). Once the holes were closed up, it was easy to finish.

Since I still have yarn in the same color, the next challenge will be making pin loom mittens to match.


My local yarn store expert pointed out that I didn't have to wash the ruana by hand in my tub. I could use the spin cycle in the washing machine if I was very careful not to let it go too long.  I actually agitated it a little by hand and then let it spin out. Taking most of the water out with the spin cycle made a great difference in drying it.


The ruana dimensions are 12 squares across by 14 squares long.  This number would likely need to be increased for taller people.

I wanted to leave enough room at the neck to make a comfortable opening so this is a sketch of the ruana front shown sideways. The two squares at the front of the neckline are folded diagonally and stitched down. I used the edging yarn to single crochet an edge all the way around the ruana.


Here's the original information on my latest project, a pin loomed ruana... which is the name given for a poncho that is split open down the front. I am going to be adding pictures of the finished project in the next week or so. These pictures show an earlier stage, with most of the outfit still in piles of squares.

It is now finished, but I need to full it slightly before there are more photos. I'm going to swish it around in the bathtub with a small amount of Neutragena basic shampoo to full it and then it using my steam iron to pull and flatten the seams while only very lightly touching the fabric.


I found the yarn for the body of the ruana at a local church flea market. Someone had purchased six skeins of Germantown worsted weight wool yarn in "Glen Heather" and then carefully stowed them away for twenty years or so. Germantown may not be a currently available product but I think there is still an awful lot of it around, still waiting to be knitted, woven or crocheted.

The Minnesota winter has been so cold this year that the idea of a cozy warm wool blanket shaped to fit my body has sustained me while weaving all the squares. Pattern details will be forthcoming but just to let you know, the finished piece in a size that works for my short stature has 168 squares.  One problem that I ran into was that the Glen Heather fabric needed some contrasting color.  I found several skeins of Raggi worsted weight on clearance and it turned out to be an incredible match. I love the way that the bits of dark grey assume an almost Celtic pattern in these edging squares.


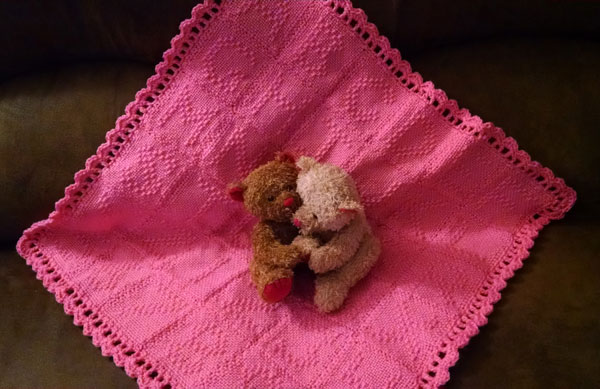
Finished pictures will go up as soon as the ruana is dry and blocked.  I figure it will take a week or so for it to dry.  In the meantime, this is a behind the scenes illustration of trying to take a picture of the woven squares with some unsolicited help.


Friday, January 20, 2017

Pin Loom Mug Rug and Mug Hug (and news of a new book)

It may not surprise anyone to learn that people in my family often get pin loomed presents for Christmas. It's after Christmas now so I won't be ruining the surprise by sharing some pictures and ideas with you.

You have probably guessed that the Mug Rug part of the combo is our own favorite 4"x 4" pin loom square. The Mug Hug aspect is a new pin loom project that I have been experimenting with.  I have found that it is both easy and fun to make pin loom rectangles on a fine gauge sock knitting loom.

Here are some examples of weaving on the sock knitting loom. You'll notice that the one in the middle has a loop crocheted on the end, these were woven and designed as fiber cuffs.  You may have also recognized the loom, its a fine gauge adjustable knitting loom. Which means that it is not only possible to weave rectangles for mug hugs and fiber cuffs, its possible to weave rectangles in a bunch of different lengths all on this one loom!


Which brings me to the second part of the story, that the newest book on pin loom weaving, Pin Loom Weaving To Go, will be available in March, 2017.

Pin looms have always thrilled me. I love their ease and portability. I love the fact that each square is complete in itself, that when you take them off the loom they don't ravel or unwind.

In Pin Loom Weaving To Go we will explore using that same pin loomed approach to weave on a sock knitting loom and on a regular old potholder loom.  But in each case you will be able to weave a completed square that pops off the loom without the need for any type of locking edge.

I am really excited about this book and I hope you enjoy it too!


Here's a couple more mugs with rugs. :-)